In the heart of mountainous wilderness, Sarah and her lifelong friend, Emma, embarked on a day of exploration and natural wonder. Their plan was simple: immerse themselves in the rugged beauty of the terrain, reconnecting with the untamed spirit of their youth. Little did they know, their adventure would lead to an unforeseen twist, involving Sarah’s husband, Jack.
Eager to share the exhilaration of their journey, Sarah paused to capture a moment of bliss, embracing her horse against the breathtaking backdrop of the mountains. She envisioned sharing the snapshot with Jack, her partner in life, who, regrettably, couldn’t accompany them that day.
As Sarah shared the photo online, a rush of excitement coursed through her veins, anticipating Jack’s reaction to their mountain escapade. However, her anticipation swiftly dissolved into disbelief when Jack’s distressed voice pierced through the phone line mere moments later.

Having stumbled upon the photo, Jack’s trust wavered, prompting him to reach out to Emma for confirmation of Sarah’s whereabouts. Emma’s unexpected response shattered the illusion Sarah had meticulously crafted—she was nowhere near the mountains, but rather occupied with mundane tasks of daily life.
In that crushing moment, Sarah realized the gravity of her deception and the irreparable breach of trust it caused. Despite her earnest attempts to explain and reconcile, Jack remained resolute in his decision.
The aftermath was devastating as Jack made the painful choice to sever ties, unraveling the fabric of their marriage. A seemingly innocuous photo became the harbinger of their relationship’s demise, serving as a poignant reminder of the fragility of trust and the consequences of deceit.
As Sarah navigated the tumultuous aftermath, she couldn’t shake the profound regret that shadowed her every step. Her tale stands as a cautionary testament to the profound impact of honesty and the perilous path of betrayal in matters of the heart.
My Neighbors Left a Note That Shattered My Heart — My Granddaughter Discovered It and Gave Them a Learning Experience
The music I played on my piano was my last link to my late husband. But cruel neighbors shattered that joy with a hurtful message on my wall. When my granddaughter found out, she made things right, leaving those entitled neighbors scratching their heads.
“Oh, Jerry, did you love it today, darling?” I asked softly, the last notes of “Clair de Lune” filling my cozy living room as my fingers lifted from the ivory piano keys. My eyes fixed on the framed photo of my late husband, Jerry. His kind eyes seemed to twinkle back at me, just as they had for over fifty years of our marriage…
Willie, my tabby cat, stretched lazily near my feet, purring contentedly. I reached down to scratch behind his ears, feeling the familiar ache in my chest as I carefully lifted Jerry’s photo.
“I miss you so much, darling. It’s been five years, but sometimes… sometimes it feels like yesterday.”
Pressing a gentle kiss to the cool glass, I whispered, “Time for dinner, my love. I’ll play your favorite before bed, okay? ‘Moon River,’ just like always.”
As I set the frame back down, I could almost hear Jerry’s warm chuckle. “You spoil me, Bessie,” he’d say, his eyes crinkling at the corners.
I shuffled towards the kitchen, pausing to look back at the piano, my constant companion these past 72 years.
“What would I do without you?” I murmured, running my hand along its polished surface.
That night, as I lay in bed, I whispered into the darkness, “Goodnight, Jerry. I’ll see you in my dreams.”
The next morning, I was lost in Chopin’s “Nocturne in E-flat major” when a sharp rap on my window startled me. My fingers stumbled, the music cutting off abruptly.
A red-faced man glared at me through the glass. He was my new neighbor.
“Hey, lady!” he shouted, his voice muffled. “Cut out that racket! You’re keeping the whole neighborhood awake with your pathetic plinking!”
I stared at him, shocked. “I… I’m so sorry,” I stammered, even as a small voice in my head protested. It was barely 11 a.m., and none of my other neighbors had ever complained before.
The man stomped away, leaving me trembling. I closed the lid of the piano, my sanctuary suddenly feeling tainted.
The next day, I closed all the windows before sitting down to play. The music felt muffled and constrained, but I hoped it would keep the peace.
I was barely ten minutes into Beethoven’s “Moonlight Sonata” when my doorbell rang insistently. With a heavy heart, I answered it.
A woman with pinched features glared at me. “Listen here, old lady,” she spat. “The grave’s calling, and you’re still banging on that piano? Cut the noise, or I’ll report you to the HOA!”
It was only then that I understood she was my new neighbor’s wife.
I felt like I’d been slapped. “I… I closed all the windows,” I said weakly.
“Well, it’s not enough!” she snapped, turning on her heel. “Quit making noise with your stupid piano!”
I slumped against the door frame, tears welling in my eyes. “Oh, Jerry,” I whispered. “What do I do?”
I could almost hear his voice, gentle but firm. “You play, Bessie. You play your heart out. Don’t stop… for anyone.”
But as I sat at the piano, my fingers hovering over the keys, I couldn’t bring myself to press down.
Days passed, and I tried everything. I taped cardboard over the windows, played only in short bursts, even considered moving the piano to the basement where it might not be heard.
But nothing seemed to satisfy my new neighbors, the Grinches, as I’d started calling them in my head.
The thought of being separated from my cherished instrument, even by a flight of stairs, made my heart ache. This piano wasn’t just an object; it was an extension of my soul, a living connection to Jerry and our life together.
Forgetting about those bothersome neighbors for a moment, I lost myself in the music as I played the piano that night.
The next morning, I stepped outside to tend to my small herb garden. The sight that greeted me stopped me cold.
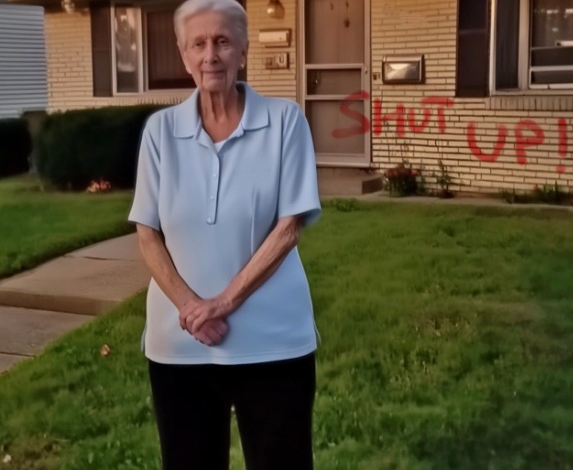
The cruel words “SHUT UP!” were spray-painted across the wall in angry red letters.
I sank to my knees and wept. “Jerry, I can’t do this anymore.”
That day, for the first time in decades, I didn’t touch my piano.
As night fell, I sat in Jerry’s armchair, clutching his photo. “I’m so sorry, my love. I just don’t have the strength to fight anymore.”
The shrill ring of the telephone startled me from my thoughts. I fumbled for the receiver.
“Hello?”
“Mom? It’s me,” my son Jacob’s warm voice filled the line. “How are you doing?”
I swallowed hard, fighting back tears. “Oh, I’m fine, sweetie. Just a quiet day at home.”
There was a pause. “Mom, you don’t sound fine. Is everything alright?”
I sighed, debating whether to burden him with my troubles. “It’s nothing, really. Just… some issues with the new neighbors.”
“Issues? What kind of issues?”
I found myself spilling everything… the complaints, the threats, the vandalism.
“I don’t know what to do anymore, honey. I feel so… lost.”
“Oh, Mom, why didn’t you tell me sooner? We could have helped.”
“I didn’t want to worry you. You have your own life, your own problems.”
“Mom, you’re never a burden. Never. Your music has brought joy to so many people over the years. Remember all those Christmas parties? The school recitals you played for? You’re not a nuisance… you’re a treasure.”
“Listen, I’m going to call Melissa. She’s closer. Maybe she can come check on you. And we’ll figure this out together, okay?” Jacob finished.
As I hung up the phone, I felt a small flicker of hope. Maybe I wasn’t alone in this after all.
Days crawled by. My piano sat untouched, gathering dust. I felt like a part of me was withering away.
One evening, a loud knock startled me from my melancholy. I opened the door to find my granddaughter Melissa standing there, her face glowing with a warm smile.
“Surprise, Nana!” she exclaimed, enveloping me in a tight hug.
As she pulled back, her eyes widened in horror. “Nana, who did this to your wall?”
I burst into tears, the whole story spilling out between sobs. Melissa’s expression darkened with each word.


Leave a Reply